Setting up your Mimaki Plotter
Setting up your Mimaki Plotter
Connecting your Mimaki cutting plotter to work with Platinum Cut is a straightforward process. By installing the official Mimaki drivers, your plotter will be properly configured in the Windows environment to receive jobs via a USB connection.
Note: There is no need to change any internal settings on the cutter itself. Simply ensure it is connected via a USB 2.0 compatible port and set to "REMOTE" mode.
Supported Models: CG-60AR, CG-100AR, CG-130AR, CG-75FXII Plus, CG-130FXII Plus, CG-160FXII Plus, CG-75FXII, CG-130FXII, and CG-160FXII.
Installation & Configuration Steps
- 1. Install General Driver: Download and install the Mimaki General Driver.
- 2. Reboot PC: Reboot your computer to ensure the driver initializes correctly.
- 3. Connect Plotter: Connect the Mimaki cutter to a USB 2.0 port on your computer.
- 4. Install Windows Driver: Download and install the Mimaki Windows Driver.
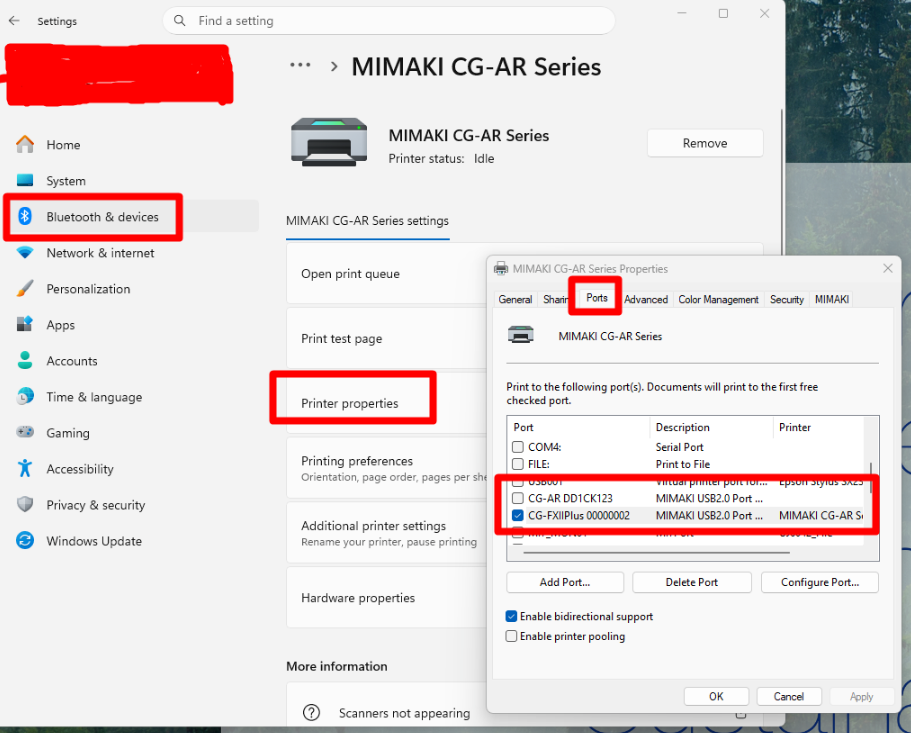
- 5. Open Printer Settings: In Windows, go to Settings → Bluetooth & Devices → Printers & Scanners → Mimaki CG-AR Series → Printer Properties.
-
6. Configure Port:
Open the Ports tab, select the port to which the cutter is connected (e.g., MIMAKI USB2.0 Port), and click OK to confirm.
Setup Complete: The cutter is now properly configured in the Windows environment. As long as it is set to "REMOTE" mode, it is ready to receive cutting jobs from Platinum Cut!
Was this article helpful?